

Disclosure: Some links on this site are affiliate links. As Amazon Associates, we earn from qualifying purchases (at no cost to you).
Creating a Montessori-inspired bedroom for your kids can be both fun and functional. Tipi beds, with their unique design and playful appeal, are perfect for fostering independence and creativity.
Here are 10 kids Montessori tipi bed ideas that will make your child’s room a delightful haven.
10 Montessori Tipi Bed Ideas
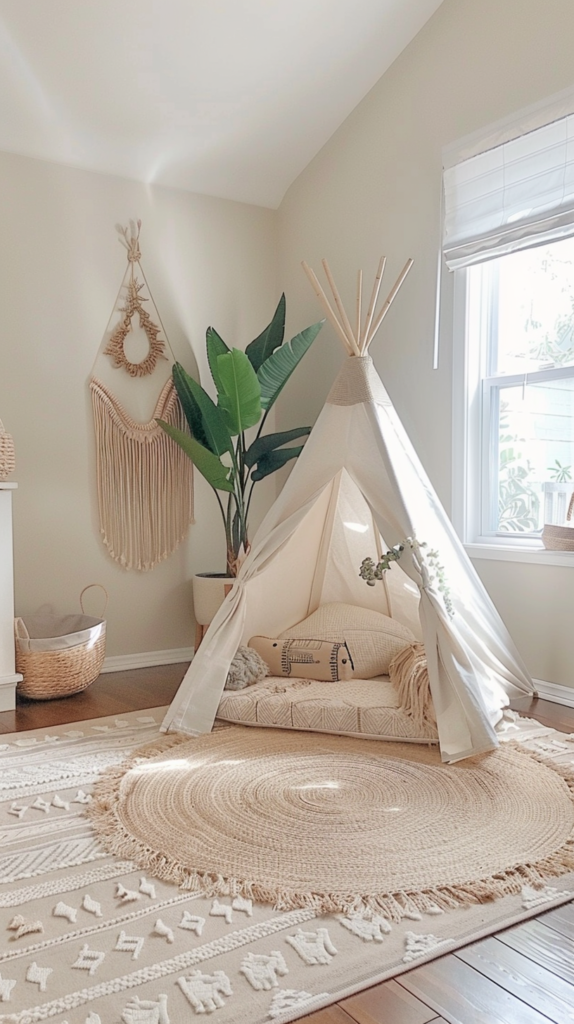
1. Natural Wood Tipi Bed
A natural wood tipi bed offers a classic and earthy feel. The simple, sturdy design encourages a sense of calm and fits seamlessly into any decor.
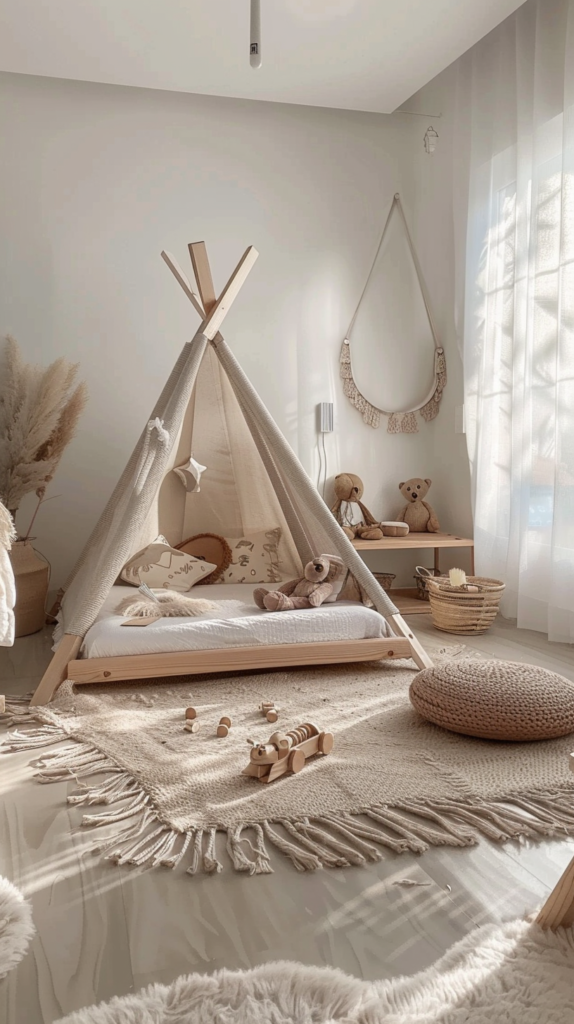
This type of bed is perfect for creating a minimalist environment. Pair it with soft, neutral bedding and a few plush toys to keep the focus on simplicity and natural materials.
2. Colorful Tipi Bed
Brighten up your child’s room with a colorful tipi bed. Opt for a bed frame painted in vibrant hues like red, blue, or yellow.

This adds a pop of color and makes the bed a focal point. Complement it with matching bedding and cheerful wall art to create a lively and inviting space that stimulates creativity.
3. Tipi Bed with Storage
A tipi bed with built-in storage is ideal for smaller rooms. Look for designs that include drawers or shelves beneath the bed. This maximizes space and keeps the room tidy.

Use the storage to organize toys, books, and clothes, ensuring everything has its place. This setup promotes independence as kids learn to keep their space organized.
4. Fairy Lights Tipi Bed
Add a touch of magic to your child’s room with fairy lights draped over the tipi bed. The soft glow creates a cozy and enchanting atmosphere.

Use sheer, white curtains around the bed to enhance the dreamy effect. This idea works well for bedtime stories and creating a calming environment for sleep.
5. Themed Tipi Bed
Incorporate your child’s favorite theme into their tipi bed. Whether it’s a jungle adventure, princess castle, or outer space, customize the bed with themed decorations and bedding.

This makes bedtime more exciting and personal. Use wall decals, themed cushions, and matching rugs to complete the look.
6. Tipi Bed with Play Area
Combine sleeping and playing with a tipi bed that includes a built-in play area. Look for beds that have space underneath or around the bed for play mats, toys, and activities.

This encourages imaginative play and makes the bed a multifunctional space. Add some soft cushions and a small table for drawing or reading.
7. Tipi Bed with Canopy
A tipi bed with a canopy adds an extra layer of coziness. Choose a bed with a fabric canopy that can be pulled closed for a snug, tent-like feel.

This creates a private retreat for your child. Decorate the canopy with playful patterns or colors that match the room’s decor. This setup is perfect for kids who love to create their own little hideaway.
8. Eco-Friendly Tipi Bed
Choose an eco-friendly tipi bed made from sustainable materials. Look for options crafted from bamboo, recycled wood, or organic fabrics.
This not only supports environmental sustainability but also provides a healthy sleeping environment. Pair the bed with organic cotton bedding and natural fiber rugs to create a completely eco-friendly space.
9. Tipi Bed with Climbing Frame
For active kids, a tipi bed with an attached climbing frame is perfect. This design incorporates a small climbing wall or ladder as part of the bed frame.

It encourages physical activity and adds an element of adventure. Ensure the climbing frame is sturdy and safe, with soft flooring underneath to cushion any falls.
10. DIY Tipi Bed
Get creative and build a DIY tipi bed with your child. Use basic materials like wood, fabric, and some simple tools. This can be a fun project that you and your child can work on together.

Customize the bed with paint, stencils, or fabric of your choice. The result is a unique, personalized bed that your child will love.
How to Create Your Own DIY Tipi Bed
Building your own DIY tipi bed can be a rewarding project. Start by gathering your materials: wooden poles, fabric for the canopy, screws, and basic tools like a drill and saw.
Cut the wooden poles to the desired height and assemble them in a tipi shape, securing them at the top. Drape the fabric over the frame, ensuring it’s securely attached.

Add a comfortable mattress, some cozy bedding, and any additional decorations like fairy lights or bunting. Your DIY tipi bed is now ready for your child to enjoy!
FAQ
Q: What age is appropriate for a tipi bed? A: Tipi beds are suitable for children aged 3 and up. Ensure the bed is sturdy and safe for your child’s age and activity level.
Q: How can I ensure the tipi bed is safe? A: Make sure the bed frame is securely assembled and stable. Use non-toxic, child-safe materials and ensure any additional features like climbing frames are safe for your child to use.
Q: Can I use a tipi bed in a small room? A: Yes! Tipi beds can be designed to fit into smaller spaces. Look for beds with built-in storage or multifunctional designs to maximize space.
Q: How do I clean a tipi bed? A: Use a damp cloth to wipe down the wooden frame. The fabric canopy can usually be removed and washed according to the care instructions.
Final Thoughts
A Montessori tipi bed is more than just a place to sleep—it’s a space for your child to explore, play, and grow. Whether you opt for a simple, natural design or a colorful, themed bed, there’s a tipi bed idea to suit every child’s personality and needs.
Creating a DIY tipi bed can also be a fun and rewarding project that adds a personal touch to your child’s room. Happy decorating!